Managing Stipa Data Collection Protocols in My Workspace
If you have reviewed the Data Entry reference, you will recall that in order to enter data into Stipa, you must first select the subject, form, attribute, and (in some cases) observation(s) the data will be associated with. The forms, attributes, and observations that you are able to choose from are defined in an XML document called the Stipa Data Collection Protocol. This document is assigned to your data collection project when the project is created.
The Stipa Workspace page provides a user-friendly environment for managing Stipa Data Collection Protocols. Protocols added to the Workspace are immediately available for use when creating a new data collection project. The Workspace also makes the process of building a Stipa Data Collection Protocol much more accessible, by providing a graphical user interface for adding, deleting, and editing protocol elements.
To add a protocol to your Workspace, navigate to the Workspace page using the page menu located in the upper right corner of the page you are currently on (Figure 1). Once there you will notice a box labelled Add a Protocol near the bottom of the view. This box provides two options for adding a Stipa Data Collection Protocol. The first option is to create a new protocol by clicking on the Add icon. The second option is to import a protocol from an XML or text file by clicking on the Folder icon and selecting the desired file using your browser's file chooser.

Figure 1. Workspace page.
All protocols that you have created or imported will be listed in your Workspace when you open it (Figure 2). This is true even if you close your current web browser and return to the Workspace at a later date. Keep in mind, however, that Workspace data is browser and device-specific. This means that protocols added using one browser will not be visible when visiting the Workspace page using a different browser, or using a different device
You will notice three primary buttons for managing each protocol listed in your Workspace. Permanently delete the protocol by clicking on the Trash icon. Edit the protocol by clicking on the Pencil icon. Export the protocol to a plain text XML file by clicking on the Export icon.
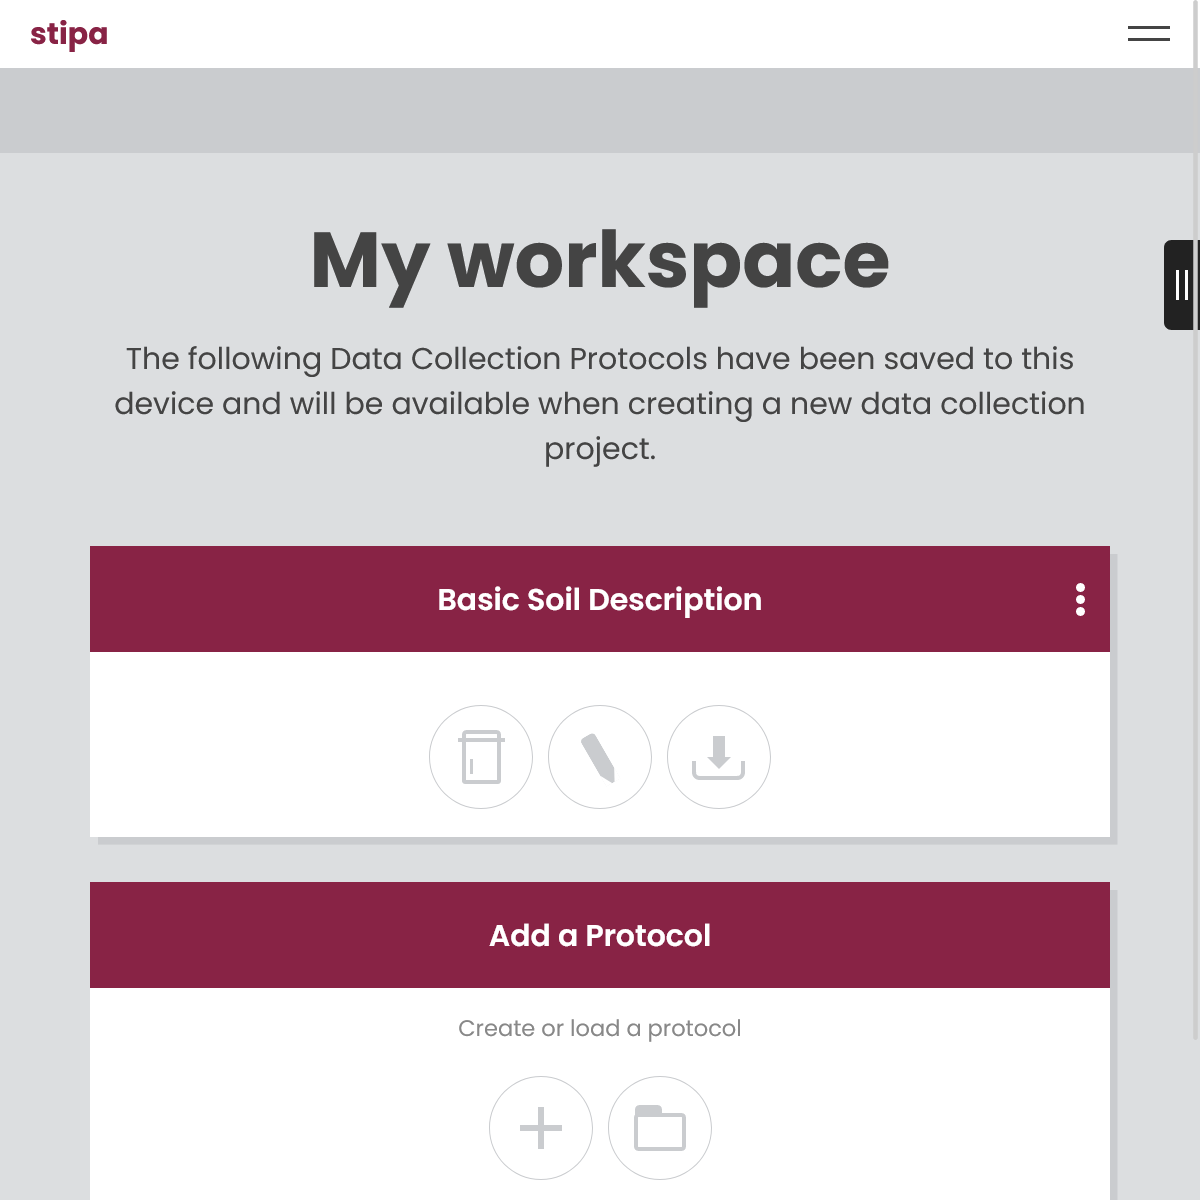
Figure 2. Stipa Data Collection Protocols that have been added to My Workspace.
Additional management options are available by clicking on the Overflow button located in the upper right corner of the protocol list item (Figure 3). These options allow you to do things such as move the protocol up and down in the list or collapse and expand list items.
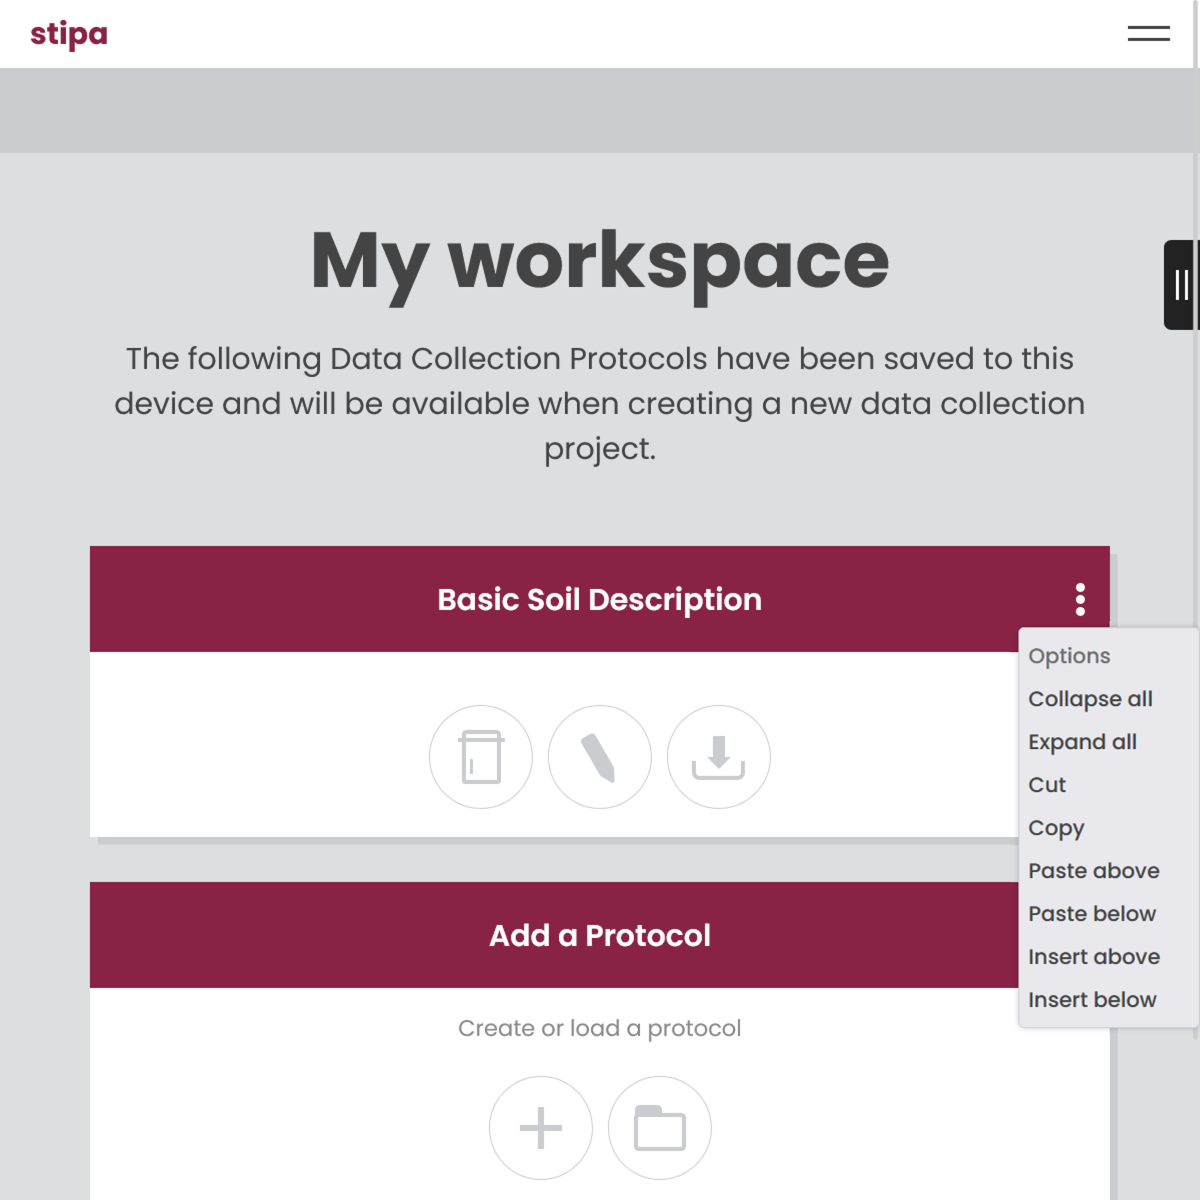
Figure 3. List item overlow menu.
Clicking on the Pencil icon opens a form for editing the protocol (Figure 4). Some form fields are required while other are optional. At the bottom of the form is a list of form elements that have been added to the Stipa Data Collection Protocol. Form elements provide a way of logically organizing observations that will be performed on subjects during a data collection effort, as described in the Stipa Data Collection Protocol reference.
The form list is organized in the same fashion as the protocol list. There is an Add a Form box located at the bottom of the list with options to create or import a form, and each list item has options to delete, edit, and export the associated form. The pattern is repeated for nearly all core elements of the Stipa Data Collection Protocol. If you open a form for editing, for example, you will find an attribute list with the same basic design and functionality as the form and protocol lists.
With the tools provided in these lists, we are able to do things such as export individual forms or attributes to an XML file, copy forms or attributes from one protocol to another, and add new forms or attributes to an existing protocol.

Figure 4. Stipa Data Collection Protocol editing form.
If you've opened an attribute for editing and would like to return to the parent form, simply click on the Back button located near the upper left corner of the page. If you'd like to navigate to another attribute that was added to the form, simply click of the Next button located near the upper right corner of the page.
If you find this form of navigation tedious, consider using the Workspace Navigation Tree (Figure 5). The Navigation Tree provides an alternative – and likely more intuitive – way to navigate among protocol elements. Open the Navigation Tree by clicking or swiping the menu button located on the far right edge of the view. The Navigation Tree allows you to expand or collapse each protocol element to view the child elements nested within it. You can then click on an element's name to instantly view the form associated with that element.
